So – I finally got round to having a solo re-fight of this interesting battle with the rather good Lion Rampant rules by Daniel Mersey. The rules are intended to be for smaller actions but I was interested to see how they would work for larger ones. My first intro to the rules was taking part in a game of the battle of Hexham in the WotR at the York wargames show – that was a good game!
Overall, I thought the game below played well and I think that the mechanics can give an enjoyable, quick and period flavour medieval game for a larger battle.
The table
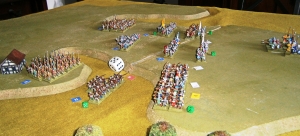
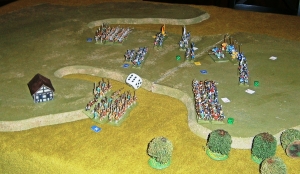
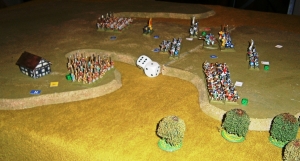
I played this on quite a small table – roughly 3 feet by 2 1/2 feet. The battle was fought on Crossgate Moor, which runs north/south and is steeply sided – see my photos in an earlier post about my visit to the battlefield. As the moor is the main terrain feature, I represented its contours in 1/2 inch chip board as you can see below. I added a building for Arbour Farm and a few trees on the west flank. Neither of these had any impact on the original battle, or for that matter, my re-fight. The picture below is the initial deployment and shows the contours of the moor. On the left is the valley below Arbour farm where the right division of the Scottish army was mauled by the English archers as they struggled across it.
Orders of battle and special rules
I changed my mind about representing the armies. I decide to keep things simple and, rather than having several retinues a side, I went for just one as follows;
English – one unit of expert archers on the left flank, one unit of dismounted MAA in the centre with the leader, one unit of dismounted MAA on the right and drilled mounted MAA in reserve. I made the latter drilled as historically they seemed to do what they were meant to and did act as a reserve, coming in at the right moment.
Scottish – two units of shiltron foot yeomen on the right, two dismounted MAA in the centre (one with leader) and one unit of dismounted MAA and one foot yeomen schiltron on the left.
My 12mm Kallistra figures are mounted on 4×2 cm bases for infantry and 4×3 cm bases for cavalry. In a unit, each base represented 2 figures so the schiltrons and archers had 6 bases and the MAA 3 bases. A base was removed when two figures were lost, with a little marker added when one figure was lost.
As far as rules are concerned, I added the following:
- Flank/rear arcs applied. -1 for armour if attacked in flank or rear
- Archers can only fire in 45 degree arc
- Movement out of front 45 degree arc at half move
- Due to the size of the table, all distances were halved ie normal move for MAA 3 inches rather than 6 inches.
How the battle played out This was my first run through with the rules and, even though playing solo, it was an exciting game that flowed well and “felt right.” The armies started in positions held in the mid-afternoon of the day of the battle. As both sides were quite defensive in outlook, neither wanted to advance. The Scots, however, were happy to delay longer and so it was the English, who after spending most of the day glaring at their enemy, advanced to extreme bow range and let fly to get the Scots to move towards them.
Turn 1
The English bowmen on the left shot their arrows causing 2 casualties and the Scots passed their courage test. English centre and left stayed in position. The forward Scots right shiltron advanced into the rough ground of the valley but the rear schiltron failed to move so ended of turn for the Scots.
Turn 2
The English continued their arrow storm on their left causing 2 more casualties with the Scots passing the courage test. The English centre and right once again stayed put. The whole Scots army advanced with the poor Scottish right advancing across the rough ground of the valley. 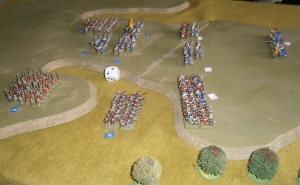 Turn 3
A bad turn for the English! Their longbow machine guns jammed and they failed their test to shoot. The Scots right continued its slow progress across the valley floor and the Scots centre with King David advanced. The Scots left failed to advance.
Turn 4
Unbelievably, the English left failed to shoot AGAIN!! Perhaps they were desperately getting more arrows! The Scottish right charged out of the valley to attack the English archers – the English benefiting from a +1 armour for being uphill. One casualty each was caused and so the Scots, being attackers, had to fall back. The Scots attacked in the centre – 2:1 to them and so the English centre fell back after both sides passed morale tests and no hits on leaders. The front unit on the Scots left advanced, once again let down by the rear unit on that flank that failed to do so. 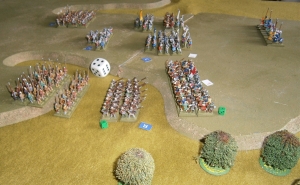
Turn 5
The English archers got back in the game and actually managed to shoot – hurrah! Three casualties were caused and the front Schiltron on that flank was now at 1/2 strength and became battered. As it retreated into the unit behind, it had to roll a dice for further casualties but fortunately got a six. Had it scored below its courage, it would have suffered whatever the die score was in casualties. The English centre failed to attack so turn over for the English.
The Scots right failed to rally so lost another casualty and retired into the unit behind – once gain scoring above its courage to avoid casualties. The rear unit on the right backed up 1/2 move. I played a house rule by which units moving other than forward could only move 1/2 distance fo the terrain they were in.
The Scots centre forward unit attacked the English centre. Lucky rolls by the English resulted in a 2:1 win to them. There were no leader casulaties and both were now at 1/2 strength. The Scots retreated. The forward unit on the Scottish left attacked the English right – a draw with one casualty each, no leader casualties, both passing courage tests and so the Scots retreated.
At this point I did wonder if leaders casualties were too difficult to get!
Turn 6
The English archers continued to maul the Scots right with three more casualties and a battered courage test result.
The English right attacked the Scottish left with 1:1 casualties – but the Scots failed their courage test becoming battered. As, in the real battle, the Scots left were less than enthusiastic and finally refused to support David, I did not let them have the +1 from the leader for courage tests.
The English centre pulled back to allow space for the reserve mounted men at arms and the men at arms advanced.
The Scots forward unit on the left just managed to rally but the Scots right, after withering damage from the English archers routed.
The Scots centre charged the English mounted unit – a bit rash as it was now at 1/2 strength! The English successfully counter-charged and it was a 2:0 win to the English with the Scots just passing their courage test, suffering no leader casualty and then retreating.
The Scouts right – or what was left of it – proving Einstein’s maxim that madness is doing the same thing and expecting different results – marched down from the hill towards the English archers as their routed colleagues had done.
Turn 7
The English archers caused three casualties on the remaining schiltron on the Scottish right. It failed its courage test and did not benefit from the +1 leader bonus as it too far from the King. Battered!
The English cavalry charged into the Scottish centre with the King in it – a 2:0 victory that destroyed the leader’s unit. This triggered a morale test for the whole Scots army. All passed except for the rear left unit that became battered.
The English right attacked the Scots left with a 2:1 victory but the English failed the courage test and the Scots passed.
The Scots right then passed its courage test for being battered and removed its battered status. On the left, the rear Scots unit also passed it courage test and then the less strong unit on the left moved back and to the right to allow space for the fresher unit to advance later. The Scottish centre also advanced, ending turn 7.
Turn 8
On the right, the English failed its test to remove battered status and then the reserve of mounted men at arms charged the Scottish centre, winning 1:0 and causing the Scots to retreat. The English archers then shot at long range, so needing a 5+, to hit, inflicting two casualties and a battered result on the Scottish schiltron. The English centre moved to the right – I played that movement out of the 45 degree front arc was at 1/2 speed.
On the Scottish left, the courage test was failed and the so stayed battered. The Scottish centre bravely charged the English cavalry – who failed their attempt to counter-charge. The English then recovered with a jammy roll and achieved a draw and so the Scots had to retreat. On the left, the fresher Scots schiltron miserably failed to take advantage of the opening to advance, failing its move roll.
Turn 9
This was the last turn. The mounted knights charged the Scottish centre who failed their courage test and routed, ending the game. Normally play is until there are 5 units left on the table but I decided that the end would be when one side was at 50%
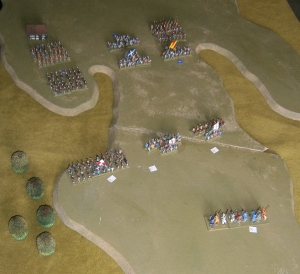
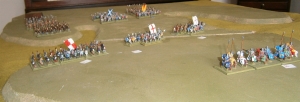
Great ideas for big battles! Thank you!
LikeLike